Showing posts with label Opt-out Recipes. Show all posts

Sunday, September 4, 2011

Roast no-Beast


I have been promising to post this particularly long recipe for a while.  It is not hard but I do not make it very often because it takes five hours start to finish.  Now, four of those hours are completely inactive, but I know that kind of commitment to food just is not possible for most of us.  

That being said, this is so worth it and I do not buy store bought sandwich slices anymore.  This started out as Sham (replaces ham slices) and was developed into Roast no-Beast (replacing roast beef), and now it is sometimes Fakey (you guessed it, turkey) and Shicken (umm, I have kids don't judge the names, chicken).  This blog will be on the no-Beast variation but I will get the variations up when I get back from retreat -- so you guys will look forward to my return.  :)

I am a visual learner and this recipe has a lot of steps so I hope you like the pictures - so many pictures - included in this post.  

Ingredients:   
ground almonds - 5 tablespoons
smoked tofu - 7 ounces 
         (I have only been able to find this at Winco and the package is 7.14 ounces and I throw it all in)
No Beef base Bullion - 1 tablespoon
Soy sauce - 1 tablespoon
Kitchen Bouquet - 1 tablespoon
Liquid Smoke - 1 tablespoon
Tomato paste - 1 tablespoon
Ketchup - 1 tablespoon
Vegetable oil - 3 tablespoons
Finely chopped onion - 1/4 cup
Brown sugar - 2 tablespoons
Nutritional yeast - 1 tablespoon
Minced garlic - 1 teaspoon
Black pepper - 3/4 teaspoon
Salt - 1/2 teaspoon
Vital wheat gluten - 1 cup plus 3 tablespoons
Red wine of your choice - at least 1 cup for deglazing with.
                                                                                                       

If you’re starting with whole almonds, grind them in the food processor first and set aside.


Crumble the tofu into the blender. 
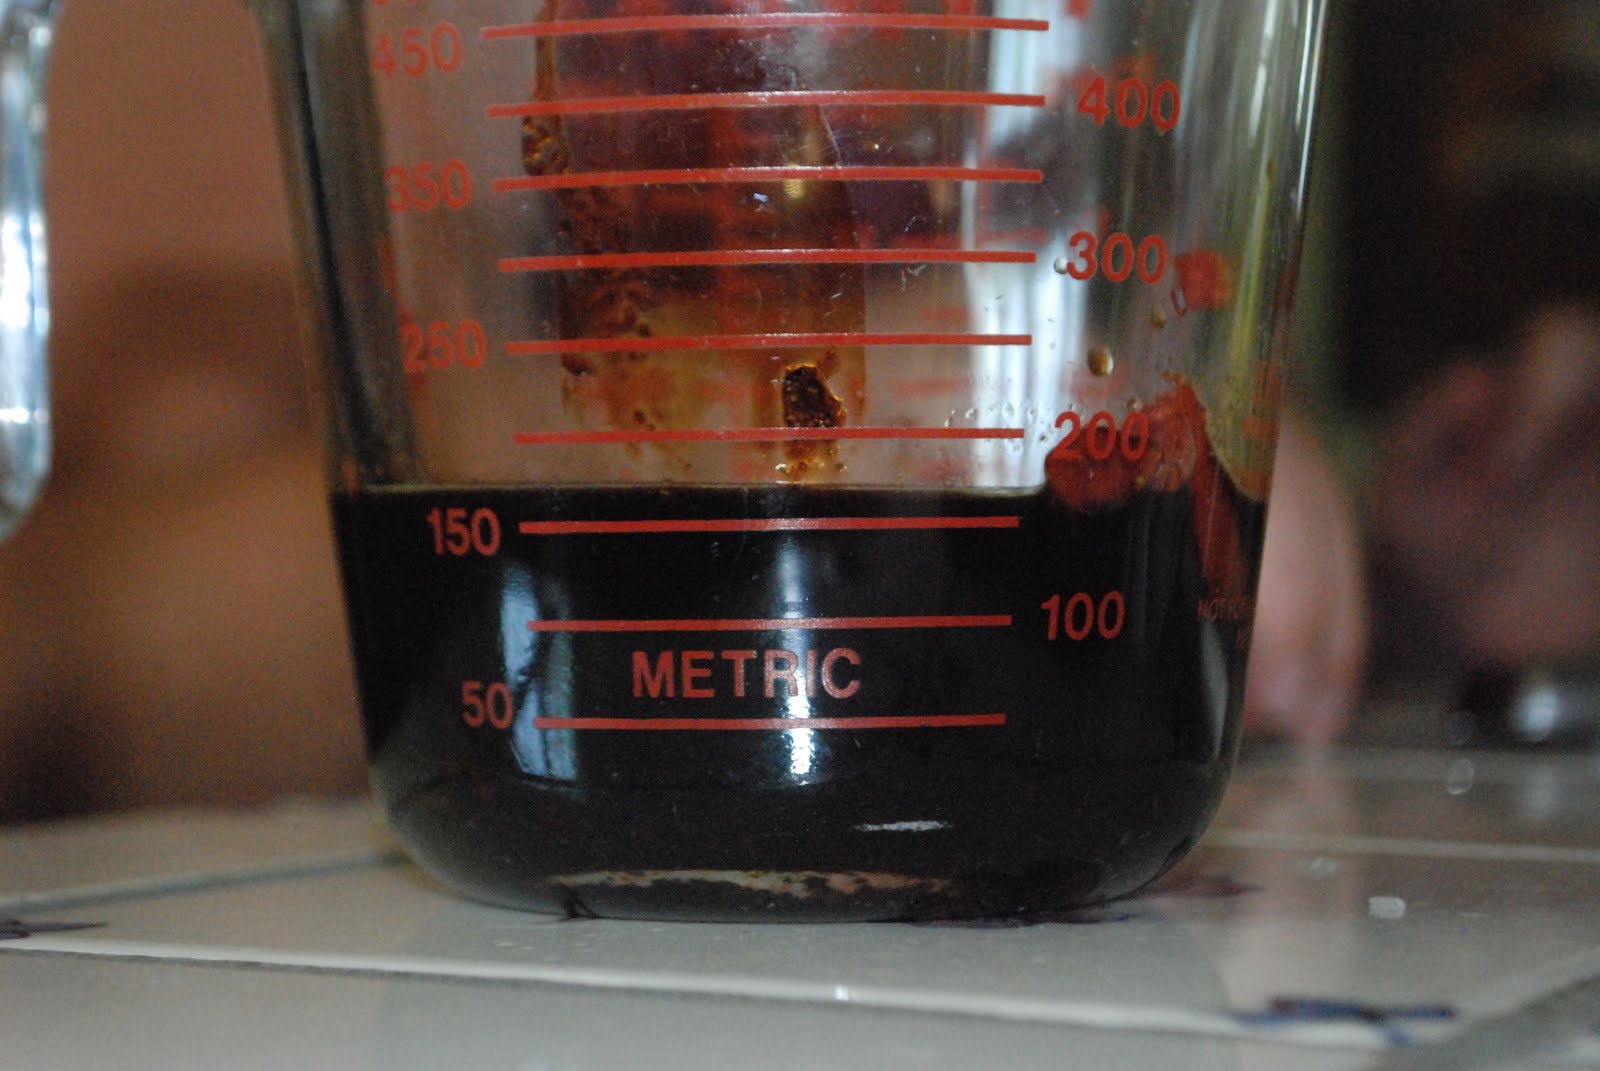
Put the bouillon in a glass measuring cup and add a couple tablespoons of very hot water to activate. Then add the soy sauce, Kitchen bouquet, liquid smoke, tomato paste, and ketchup to the measuring cup.  Top up to the 150 ml measure line on the glass with either your red wine of choice or water (this should only be a tablespoon or two total added liquid).

Add remaining ingredients to blender EXCEPT gluten and reserved wine. This means you are filling the blender with the veggie oil, onion, sugar, nooge, garlic, pepper and salt. :)  

Add this liquid mess to the blender, scraping out the glass with a rubber spatula if needed.

Blenderize until completely smooth. You now have the beginnings of a 'meat' shake.  :)
Empty into a large mixing bowl with the vital wheat gluten.

Stir the gluten and 'meat' shake together with your hands until evenly combined.
 
 You’ll have a soft dough. Do not over mix or knead the dough, I know it doesn't look like much now but with the magic of steam this will be your sandwich slices. 
Turn out onto a large sheet of plastic wrap and form into a log.


Wrap it up tight by rolling it down the sheet.  I do this twice, once the fat way and once the skinny way.


Then wrap it again in two to three layers of aluminium foil being careful to keep the seams from lining up. Essentially you want to keep all the magic steam from actually getting into your soon to be yummy sandwich filling. 

I mark the fat sides 1-4 with a sharpie to make the next step easier.
Bring water to boil in a pot that has a steamer insert. Steam for two hours over gently simmering water, turning roll a quarter turn every half hour (I start with the 1 facing up and keep track of turns by the numbers). 


Place in the steamer (don't be confused by the double loaf, I made two but these instructions are for a SINGLE loaf).
Check water level regularly to ensure the pot does not boil dry and add hot water as necessary.  Remember to turn the loaf every 30 minutes.  Turn heat off and let sit in the steamer to rest for two hours. 


  Carefully unwrap and slice. 


Voila!  You have sandwich slices.  These are ready to go as is, and with all the other variations you stop here, but for me, the roast needs a final step.

Take your slices and julianne them.

Get olive oil heating in a cast iron skillet (the cast iron really does give the best flavor results). 


Add the roast strips to the hot oil in the pan and sauté briefly.
Splash in some of that red wine to deglaze.


 Remove from heat after letting it saute just a bit more.
That gristly goodness you just created is now ready for some dense, nutty wheat bread and mustard, served with the cold beverage of your choice.  I recommend a cold cider myself.   

This recipe makes a large loaf about 1 to 1 1/2 pounds.  It keeps well in a sealed plastic container in the fridge for two weeks or so.  

Saturday, August 27, 2011

Crackers for crackers!

Cooling on the rack after a quick 15 min in the oven.  :)
We are testing four awesome cracker recipes this weekend.  None of these are mine but they are AWESOME!

First off is from 500 Vegan Recipes -- my favorite cookbook of all time!

Go to page 97 for this delectable cracker recipe!  It takes two minutes in the mixer and moments with the pasta roller to get perfect cracker dough.  We then just cut them with our little pasta cutter.  They aren't the dark orange you get from a box but they pack all the cheesy flavor of those pre-made store bought crackers.  I promise.

1 C Flour, 1/3 C Nooge, 1 tsp salt, 1/2 tsp pepper and 4 Tbs earth balance. 

After you add the 1/4 C soy milk just gather into a dense ball

I rolled this first batch by hand; second batch PASTA ROLLER!

Crackers after cutting with adorable animal cutters by the proud assistant.


Monday, May 24, 2010

Food Nifty: Granola Math!

Ok here is one recipe my family does, and I was going to blog it the next time I made it, but my wonderful pal already got an excellent blog post up - so why redo an excellent blog? My only add is that if you are a "camper" or "hiker" there is nothing better than homemade trail mix... Enjoy!


I have fond memories related to granola. My mother made ours, and the warm, toasty smell of oats wafting up the stairs late at night (the only time she could assemble it without lots and lots of “help”), to where I lay in bed, sneaking extra chapters in my book by the thin crack of light at the hinge of my door, was one of the best smells of childhood. (The others were the smell of freshly sharpened pencils, rubber cement, yeast for bread, and peppermint tea. Also, books.)

The mornings after Mom made granola were lovely. Sweet glazed oats, sunflower seeds, cinnamon… I could even tolerate the raisins. (Pleh.)

These days, granola is a favorite breakfast, snack, or supper at our house. I prefer to make it at home, to better accommodate our own flavor preferences, and also to fit our budget (it’s dirt cheap! Yay!) and avoid the chemicals that seem to go into even the expensive types. Why is xanthum gum in my cereal?

Granola is marvelously flexible. I stick fairly closely to the general ratio (see below), and then just go wild with the fun stuff.

Granola Basic Ratio

    5 cups old fashioned rolled oats about 3/4 cup honey, though you can substitute other sweets, like maple syrup, brown sugar, or molasses for a portion of the sweet. a scant 1/2 cup light-flavored oils, part of which can be other fats (see below again!)

Mix the sweet and fat together to more easily coat the oats; drizzle them over the oats and toss/stir well to coat them thoroughly, without globs.

Spread the oats in a shallow baking pan (the thinner, the better), and toast uncovered in a low oven (250* to 300*) until the oats are golden and fragrant. This could take as little as 20 minutes. Be sure to check and stir the oats at least every 10 minutes, and every 5 minutes as you get close to the end.

Clumpy, or Free?

If you like clusters of oats, try to disturb the mixture as little as possible while toasting and cooling it. If you prefer loose flakes, go ahead and break up the clumps each time you stir the oats during toasting.


Interesting Flavors


Variations and add-ins are where you can find the personal creative outlet in your breakfast foods. For instance:

Base Flavors

You might also consider adding a splash of good extracts to the sweet/fat mixture before drizzling, such as vanilla.

Dried Fruits

I prefer to mix in chopped dried fruits after the granola has cooled. It prevents the fruit scorching or hardening. Aim for about one cup of dried fruit in an official morsel size (rather small, about the size of raisins) rather than just a few great honking figs tossed on top. Those look like bugs, and no one wants that. Raisins are bad enough.

Raisins are also familiar, and cheap (almost tawdry, one might say, if one had a particular bias against raisins. Pleh.) Don’t overlook chopped dried apples, bits of fig or date, bits of banana chip, chopped dried tropical fruits, dried blueberries, cherries, raspberries, or cranberries… the options and flavor combinations are quite varied.

Think of dried fruits as an enhancement, not the main show; try to limit yourself to about a cup of mix-in fruit, total, per basic ratio batch of oats. This is harder than you think. It’s rather like taco salad. You start with something reasonable, and then it tends to get out of hand very rapidly.

Nuts In General

I prefer to use raw, naked nuts and let them roast with the oats, as above. You could choose to use already roasted nuts (but good gravy, buy them in a bulk food section, because the pre-packaged stuff is just highway robbery); if you do, look for unsalted nuts, or you risk an over-salted breakfast. Not nice.

You can mix in just about any nut (haven’t met one I didn’t like yet!), but make sure they are thoroughly shelled and quite naked.

If you’re mixing in flaked coconut (unsweetened), you could add it before roasting. If it’s the sweetened kind, sprinkle that in when the oats have cooled, or again, you risk scorching due to the higher sugar content in the sweetened flake coconut.

With these mix-ins, as with fruit, aim for about one cup total blended in with the five cups oats base. You could certainly vary the contents within that cup, though.

You can enhance the nut flavor by using nut butters in partial place of the oils in the basic ratio. For instance:

Honey-Nutty Granola

Substitute melted peanut or almond butter for about half the oil. Add about a cup of raw, naked nuts to the oats as you coat them, and let everything roast together.

Spices

I like to blend any spices, such as cinnamon, ginger, clove, or nutmeg, directly into the sweet/fat mixture for more even distribution through the cereal. Oats are fairly bland, but aim for enough spice to flavor without overpowering. For a hint of cinnamon, try a half-teaspoon blended with the sweet/fat mix for a basic granola ratio batch, and use about half that of the stronger spices. If you really like cinnamon, try a full teaspoon in the sweet/fat mix.

Storing It

Granola needs to be kept cool and away from ambient humidity, so something airtight on the shelf, or in the fridge, can work well. I prefer making smaller batches (10-cup oat bases), and doing it more frequently, rather than trying to put up 100 pounds of oats in a year’s supply of granola. Some things were meant to be stored as raw ingredients, and converted to nifty in small batches.

Eating It

Some members of my family like to put granola in a cup and eat it dry (tossing in a tablespoon of chocolate mini-chips makes them very happy.) Others are traditional “with milk” eaters. Still others prefer a bowl with a big blop of yogurt on top.

You can even make chewy granola bars by melting some marshmallows with butter, as for rice crispy treats, and blending in the granola instead, pressing it into bars and cutting. I don’t bother with wrapping or storage instructions for those, since they never survive long enough to need storing.

Rebel against Industrialized Breakfast Foods! Get crunchy and make your own granola. It’s a great way to ease into home-crafted food, and adds a lot of fiber to the family diet, too.

Just be forewarned: no one under the age of five actually chews raisins, so if you have kids in the diapering stages, be wary of “grapes.”

Tuesday, April 13, 2010

Sloppy Joes

I am SO going to Veganize this!!

Sloppy Joes: "

TPW_3778I used to be terrified of sloppy joes. It’s true. When I was a little girl, I got it in my head that sloppy joes were demons, and that if I ate them I’d become possessed and die.


Okay, listen. I know that sounds crazy. But thanks to my best friend Becky, who was a strong Baptist, demon possession was among the largest of my childhood fears. Becky and I thought my parents’ basement was possessed, she thought Vogue magazine was possessed, and I, in turn, came to believe sloppy joes—in all their wonderful, hot comfort foodedness—were possessed.


I’ve since come to see the light. I’ve made my peace with sloppy joes.


And Becky’s made her peace with Vogue magazine.


We’ve both grown a lot in our faith.


TPW_3677Here’s what you need. As you can see, I accidentally left a couple of items out of the Cast of Characters shot. And you know what they say: it ain’t a party till somethin’ gets left out of the Cast of Characters shot!


TPW_3679First, add the butter to a large skillet or dutch oven over medium high heat. Dump in the ground beef and cook it till it’s brown.


TPW_3685When the meat is brown, drain out most of the fat. Look at all of this!


TPW_3688You wanna make your cardiologist happy? Send him a photo like this.


TPW_3689Next, cut a medium onion in half from root to tip. Lay one half of the onion face down on a cutting board, then make several vertical slices across the onion.


TPW_3691Then cut in the other direction to dice it.


It’s been awhile since I showed you how to dice an onion.


It was time.


TPW_3681Now cut off the top and bottom of a green pepper or two (depending on the size.) Cut the round in half and lay the halves flat.


TPW_3682Cut the halves into strips…


TPW_3684Then cut up the strips to create a small dice.

I love dicing bell peppers. If I could get a job that would involve my dicing bell peppers 24 hours a day, I’d jump at the chance!


I’d probably quit within two days because by then I’d be really dang sick of bell peppers.


But it would be the best two days of my life.


TPW_3700Dice up some garlic, too—several cloves! Have courage!


TPW_3696Throw in the onions and peppers…


TPW_3702And the garlic! Cook this for a few minutes, until the onions and peppers start to get a little soft.


TPW_3706Measure a cup and a half (give or take) of ketchup. You can also a little jarred chili sauce, too, if you have some languishing in the door of your fridge.


TPW_3708Throw it into the meat mixture…


TPW_3711And stir it to combine. Add a little salt and plenty of freshly ground black pepper to spice things up a bit.


TPW_3715Add a cup or cup and a half of water…


TPW_3717And stir it in.


TPW_3718Next, add in a little brown sugar, some chili powder, and some dry mustard.


TPW_3723Stir it around and let it simmer for 15 to 20 minutes, just to let the flavors all meld.


TPW_3726While it’s cooking, sprinkle in some red pepper flakes to give the sloppy joes some bada BOOM bada BING BANG BOOM!


But only if you’re into that sort of thing.


TPW_3753Along the way, you can also add in a few dashes of Worcestershire sauce, more salt and pepper if needed, and even (I do this often) a tablespoon or two of tomato paste to give it a little deeper tomato flavor. Taste and test along the way—you can even add a little Tabasco to really set things on fire.


TPW_3756To serve the sloppy joes, I like to toast the buns first. It gives a little bit of substance and crispness to the sandwiches, and it creates more work for me, which is a hobby of mine.


No. Not really.


TPW_3761Be sure to use butter on the griddle!


Without butter, nothing matters in life.


TPW_3765Add a heapin’ helpin’ of the meat mixture.


TPW_3771Yummy! And no sign of Satan anywhere!


TPW_3791Plop on the top of the bun and serve it up with a big bunch of kettle cooked potato chips. The crunch is essential!


TPW_3797Oh, and if you’re feeling particularly naughty…you can melt a slice of cheese over the top.


Enjoy these! They’re scrumptious.


Love,

P-Dub


Sloppy Joes


3"x5" Cards
|
4"x6" Cards
|
Full Page
|
Print


Sponsored by HPClick Here


Prep Time: 10 Minutes Cook Time: 20 Minutes Difficulty: Easy Servings: 8

Ingredients

  • 2 Tablespoons Butter
  • 2-½ pounds Ground Beef
  • ½ whole Large Onion, Diced
  • 1 whole Large Green Bell Pepper, Diced
  • 5 cloves Garlic, Minced
  • 1-½ cup Ketchup
  • 1 cup Water
  • 2 Tablespoons Brown Sugar
  • 2 teaspoons Chili Powder (more To Taste)
  • 1 teaspoon Dry Mustard
  • ½ teaspoons Red Pepper Flakes (more To Taste)
  • Worcestershire Sauce To Taste
  • 2 Tablespoons Tomato Paste (optional)
  • Tabasco Sauce (optional; To Taste)
  • Salt To Taste
  • Freshly Ground Black Pepper, To Taste
  • Kaiser Rolls
  • Butter
Preparation Instructions

Add butter to a large skillet or dutch oven over medium high heat. Add ground beef and cook until brown. Drain most of the fat and discard.


Add onions, green pepper, and garlic. Cook for a few minutes, or until vegetables begin to get soft.


Add ketchup, brown sugar, chili pepper, dry mustard, and water. Stir to combine and simmer for 15 minutes, adding salt and pepper to taste. Also add tomato paste, Worcestershire, and Tabasco if desired. Taste and adjust seasonings as needed.


Spread rolls with butter and brown on a griddle or skillet. Spoon meat mixture over the rolls, topping with a slice of cheese if it makes your skirt fly up. Serve hot with kettle cooked chips!


"